

 Microphone Technique
 Microphone Technique
 Introduction
 Introduction
A microphone does not magically improve your performance—it simply reveals what is already there. In other words, it acts as a translator, converting the acoustic energy of your voice into an electrical signal that can then be sent to speakers, recording equipment, or a stream. The microphone does not understand effort, intention, or emotion; it only responds to distance, direction and pressure.
When you use a microphone correctly, it becomes almost invisible to the audience. Your voice reaches them with clarity, balance, and richness, without distracting distortions or sudden changes in volume. However, when you use it poorly, the microphone can exaggerate flaws, create inconsistency, and even introduce problems like distortion, plosives, or feedback. As a result, even a technically strong singer can sound weak or uncomfortable.
This lesson structures microphone technique into clear principles, decisions, and actions, so you can move from guessing to knowing. You will learn how to set up your equipment correctly, how to position the microphone for optimal sound, and most importantly, how to control your tone and volume through distance, angle and consistency—so your voice is heard exactly the way you intended.
Estimated Time: 20-30 minutes
Level: Beginner–Advanced
What You’ll Learn
 What You’ll Learn
During this lesson, you will:
Understand how microphones actually work at a basic level.
Set up your equipment correctly, including stand, cable, and microphone orientation.
Control tone and volume using distance, angle, and movement.
Manage plosives and sibilance so they do not interfere with your clarity.
Make real‑time performance decisions in the moment, rather than reacting after the fact.
By the end of this lesson, you will no longer treat the microphone as a “mystery box” that sometimes behaves well and sometimes does not. Instead, you will treat it as a tool you can control with intention and consistency.
Key Principles
 Key Principles
Before you dive into the details, anchor these few key ideas. They will guide every decision you make with the microphone:
The microphone reveals, it does not fix.
If your tone is unclear, your breath control is shaky, or your articulation is inconsistent, the microphone will show that. It cannot clean up a messy performance; it can only transmit it.Control comes from distance, angle, and consistency.
You do not need to push your voice harder or change your style to “match” the microphone. Instead, you change how you move and how you stand and that is enough to transform the sound.Movement replaces force—never push your voice to match the mic.
If the system is only producing more strain, that is a sign that your technique is off. Instead, learn to let subtle movements and positioning do the work.
Crucially, if your sound changes unexpectedly, it almost always means that your microphone position changed—not that your voice suddenly became ‘bad.’ Over time, this mindset leads to far more consistent performances.
How a Microphone Works
 How a Microphone Works
At its core, a microphone converts air movement into an electrical signal. When you sing, your vocal cords create vibrations that move the air in front of the microphone. The microphone’s capsule picks up those vibrations, translates them into an electrical current, and sends that signal to your mixer, amplifier, or recording device.
However, the microphone does not interpret your message; it only reacts to proximity, direction and pressure:
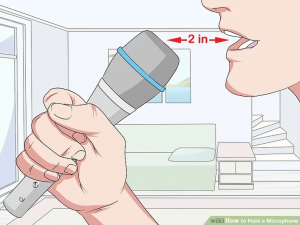
Proximity – how close your mouth is to the capsule.
Direction – where the capsule is pointing relative to your mouth.
Pressure – how much air and volume you push into it.
Equipment Basics
 Equipment Basics
Microphone Types
Not all microphones are the same, and different types are suited to different situations.
For live performance, a dynamic microphone is standard. It can handle high volume, resists feedback, and is generally more forgiving in less‑controlled environments. Condenser microphones, on the other hand, capture more detail and nuance, which is valuable in a studio setting where everything is optimised.
Polar Patterns
The polar pattern determines how a microphone picks up sound from different directions.

Always sing into the front of the microphone, not the side or back. If you face the wrong side, you lose clarity and increase the risk of picking up unwanted noise, feedback, or reflections from the room.
Setup (Before You Make Sound)
 Setup (Before You Make Sound)
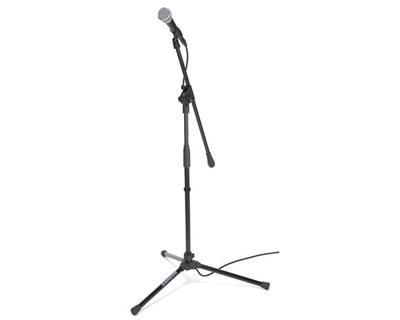
1. Stand
 First, set up the microphone stand properly:
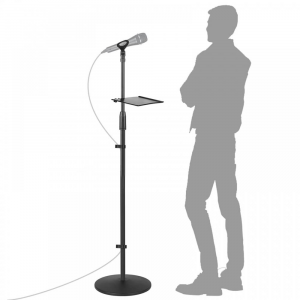
- Adjust the height so the capsule is at mouth level.
- Keep your head neutral, with your chin neither too high nor too low.
- Ensure the stand is stable and cannot wobble under normal use.
A stable stand is the foundation of a stable performance. If the stand shakes, the microphone moves, and your sound becomes inconsistent.
2. Microphone Placement
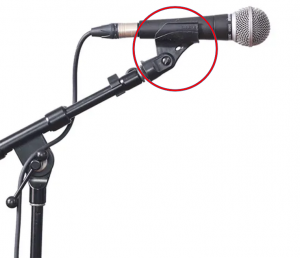
Insert the microphone gently into the clip, avoiding tight twists or forcing.
Make sure the capsule faces directly toward your mouth.
Double‑check that the front of the microphone is aimed correctly (look for the logo or marker).
Even a small misalignment can change the sound more than you realise.
3. Cable
Secure the XLR connection firmly at both ends.
Loop the cable once near the stand to provide strain relief.
Keep the cable clear of your feet so you do not accidentally kick it.
A clean, stable setup supports a calm, focused performance. If you constantly worry about loose cables or a wobbly stand, your attention shifts away from your singing.
Decision‑Based Control (While You Perform)
 Decision‑Based Control (While You Perform)
During performance, your microphone technique should be guided by constant, subtle decision‑making. Here are some questions you can ask yourself in real time:
“Is my sound too loud or distorted?”
If you hear distortion or clipping, your voice is likely too close or too loud for the microphone’s current position.
Move slightly away instead of reducing your vocal quality.
Let distance do the work, not strain.
Doing this preserves your tone and keeps your performance sounding clean.
“Is my sound too thin or quiet?”
If your voice sounds thin or distant, you are probably too far from the microphone or slightly off‑axis.
Move slightly closer to the capsule.
This small adjustment can add warmth and presence through proximity.
You do not need to push or squeeze your voice louder; you only need to bring it closer.
“Are plosives (P/B) popping?”
Plosives are sharp bursts of air that occur with sounds like P, B, and T. They can cause harsh “pops” in the mic.
Angle the microphone slightly off‑axis—about 30–45 degrees.
This redirects the air blast past the capsule while still capturing your voice clearly.
As a result, your articulation stays strong, but the plosives disappear.
“Is my tone inconsistent?”
If your tone keeps changing, it is usually a problem of distance or angle.
Check that you are maintaining a consistent distance from the microphone.
Ensure your angle does not tilt or drift during the performance.
When your movement is controlled, your sound stays stable, and the audience perceives a much more professional performance.
The Three Critical Variables
 The Three Critical Variables
There are three main variables you can control with the microphone: distance, angle, and consistency. These are the tools you use to shape your sound in real time.
1. Distance (Your Primary Control)
Distance is the most powerful and immediate way to change your tone and volume.
This technique is often called “mic riding.” When you move closer for softer, more intimate moments and pull back slightly for louder sections, you keep the overall volume of the sound clear and controlled. The audience does not hear the “jump” in level because the microphone absorbs it.
2. Angle (Control Harshness)
The angle of the microphone gives you fine control over harshness and plosives.
On‑axis – the microphone faces directly into your mouth; this gives the fullest sound.
Slight off‑axis (30–45°) – reduces harshness and plosives while still capturing your voice clearly.
Importantly, never sing across the top of the microphone. Always aim for the capsule at the front. The capsule is designed to capture sound from that direction.
3. Consistency (Professional Standard)
Even the most technically skilled mic work will sound messy if it is inconsistent.
Keep your distance from the microphone stable.
Keep your angle relatively stable.
Only change these when you do it on purpose.
If your distance or angle keeps changing randomly, the audience will hear distracting shifts in tone and volume. Those little changes accumulate into a performance that feels unstable, even if your voice is strong.
Precision Positioning
Correct Height
The capsule of the microphone should be level with your lips.
A slight upward angle of 10–15 degrees is usually ideal. This angle keeps the sound full without emphasising too much low‑end build-up.
Identifying the Front
To make sure you are using the microphone correctly:
Look for the logo or marker on the front.
On many models, the flat grille indicates the front of the capsule.
If you sing into the wrong side, you lose clarity and may introduce feedback or unwanted room reflections. Always check this before you start.
Plosives & Breath Control
 Plosives & Breath Control
What Are Plosives?
Plosives are bursts of air that accompany certain consonant sounds, such as P, B, and T. These bursts travel directly to the microphone and can cause pops or distortion.
How to Fix Them
Angle the microphone slightly off‑axis.
Direct your airflow past the capsule rather than straight into it.
Use controlled articulation techniques from your Singers Alphabet lesson so your consonants are clean but not aggressive.
Never blast a wall of air directly into the capsule. The microphone does not need that much pressure; it needs clear, controlled sound.
Handheld Technique
If you occasionally sing with a handheld microphone, the grip matters just as much as the positioning.
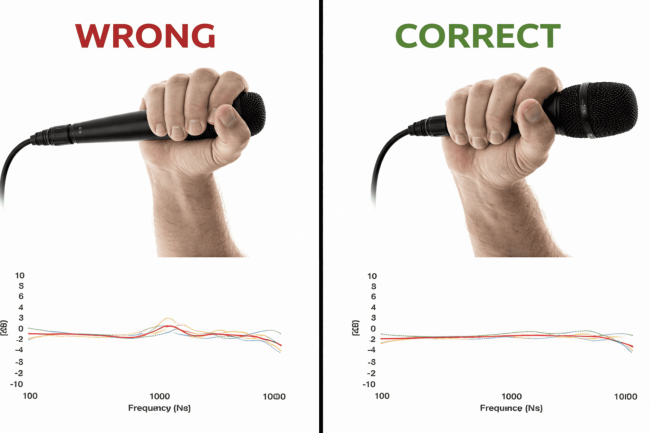
Hold the body of the microphone, not the grille.
Do not cover the vents, as this can change the sound and increase the risk of feedback.
Keep your grip relaxed; tension in your hands can travel into your voice and make your tone feel tight.
A relaxed, stable grip supports a calm, grounded performance. When you are not fighting the microphone in your hand, you can focus entirely on your voice.
Room Awareness
 Room Awareness
The microphone doesn’t only hear your voice—it also hears the room. As a result, your physical environment plays a role in how your sound comes across.
Avoid standing directly in front of hard, reflective surfaces like bare walls or windows.
Stand away from walls whenever possible.
Use soft surroundings like curtains, rugs, or soft furnishings if you can.
When the room absorbs unwanted reflections instead of bouncing them back into the microphone, your sound becomes cleaner and more controlled.
Diagnostic Pathways (Problem → Fix)
Distortion / Clipping
 Distortion / Clipping
Cause: Too close to the microphone or too loud.
Fix: Move back slightly and maintain the same vocal quality. Do not try to “sing quieter” unless it also fits the style and intention.
Thin or Weak Sound
 Thin or Weak Sound
Cause: Too far from the microphone or slightly off‑axis.
Fix: Move closer and realign the microphone so the capsule is facing your mouth again. This small change can dramatically improve warmth and fullness.
Popping Sounds (Plosives)
 Popping Sounds (Plosives)
Cause: Air bursts from consonants hitting the capsule directly.
Fix: Angle the microphone slightly off‑axis and use controlled articulation so the air moves past the microphone rather than into it.
Feedback (High‑pitched Squeal)
 Feedback (High‑pitched Squeal)
Cause: The microphone is pointing directly at a speaker or monitor.
Fix: Reposition the microphone so it points away from the monitors and toward the audience or recording device.
Inconsistent Volume
Cause: Uncontrolled movement or random changes in distance.
Fix: Maintain a steady distance and practise mic control as a skill in itself. Over time, your movements become smooth and intentional instead of reactive.
Common Mistakes
 Common Mistakes
Even experienced singers slip into unhelpful habits. Avoid these:
Cupping the microphone grille. This blocks vents and can increase feedback.
Singing into the wrong side of the microphone, which reduces clarity.
Holding the microphone too tightly, which transmits tension into your voice.
Letting distance vary randomly, which creates distracting volume and tone changes.
By replacing these habits with conscious, calm technique, your performances will sound more polished and consistent.
Daily Practice (5 Minutes)
 Daily Practice (5 Minutes)
To build real skill, not just awareness, dedicate a short, focused period to practice.
Set the microphone to the correct height.
Sing one short phrase at three different distances:
Close
Mid
Far
Listen back and notice how each distance changes the tone and volume.
Through this simple exercise, you learn how subtle movement shapes your sound. Over time, those small, intentional movements become second nature.
Lesson Recap
The microphone reveals your voice; it does not fix it.
Distance controls tone and volume; you do not need to push your voice harder.
Angle controls clarity and harshness, especially around plosives.
Consistency in distance and angle creates a professional, stable sound.
Key Takeaway
The microphone does not want more effort. It wants clarity, consistency, and respect for physics.
If you treat the microphone as a tool you can control with small, deliberate movements, your performances will become cleaner, more confident, and more enjoyable for both you and the audience.
Continue Learning
 Continue Learning
Breathing Techniques Lesson – to support clean, controlled sound.
Vocal Warm‑Up Lesson – to prepare your voice before using the microphone.
Performance Mindset Lesson – to stay calm and focused, even with distracting environments.